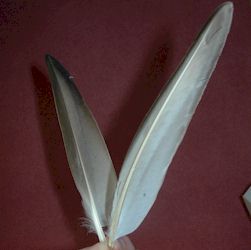
| You need one pair of matching primary wing
feathers, that's the front longest feathers from a ducks wing, one
feather from each wing. I suggest a mallard duck wings for
starters as they are easy to work with compared to some other
feathers. The reason for a matching pair is so that our flies
wings will naturally curve away from each other, as the feathers
do below to create a nice pair of wings

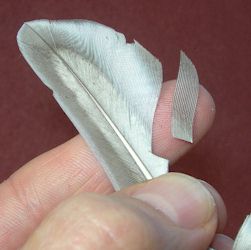
With a sharp pair of scissors cut a wing slip from each
feather, from the same part of the feather so that they'll be the
same length.

Bind a hook with the thread, leaving it hanging down at the
point where you want to tie in the slips. Align the slips carefully on top of each other and
then grip between
your forefinger and thumb of your left hand. Note
the position of the thread below, far enough back to allow for room to
later tie off the hackle

Measure the approximate length of the wings against the hook,
with the front of the slips/wings facing downwards as shown, while
holding in place, swap the grip to your right hand, gripping
between thumb and fore finger as shown in the next picture. This
will hold the slips in place and stops them from moving as you tie
them in.

This is the tricky bit. Lift the thread straight up
between thumb and wing slip. (I couldn't photograph this, don't
have enough hands!) We
lift the thread up then take it straight back down the other side between wing
slip and fore finger, but don't tighten yet, then back up between
thumb and slip again. Now holding the wing slips firmly, pull up
on the thread to tighten and pull the slips firmly against the hook
in a smooth movement.

The end result should be something like the above, (in the above I
have got the slips tied in a little to close to the center of the
hook, need more practice.) You can tie the slips in a bit more,
but don't come forward past the first wind of thread as that will
affect how the slips look, then trim the ends off.

Next step is to grip the slips firmly and lift them up
vertically. (actually it's best not to let go of them in the first
place) Pull firmly upwards and wrap the thread several times
around the base of the wing slips. This secures them in an upright
position without damaging them. You can then release your grip,
the slips may remain stuck together so gently separate them. You
can then spread them further as desired using a figure of eight
pattern between the two slips

And this is the result. A little glue around the base will give
more strength. Note there is plenty of room in front of the slips
for the hackle and to tie off. They do take practice, and they
don't all turn out perfectly.
|